Sunday, June 30, 2019

Deep Learning in Ubuntu: nvidia drivers and cuda

A Deep Learning environment in Ubuntu 18.04 Bionic Beaver:
Nvidia drivers and CUDA libraries


Hardware environment:
Lenovo ThinkStation P300, equipped with a intel i7 CPU 6core, 32Gb RAM, an Nvidia Quadro P2000 GPU, a nvme 512Gb SSD storage, and a 8Tb SATA HDD.

I am setting up the system to be dual boot: windows 10pro/ubuntu linux.
In order to have the dual boot environment operational, from within the preinstalled windows 10pro system, I was running the Windows 10 media creator, to prepare a USB key for system reinstall.

After that i proceeded reinstalling windows from the USB key, repartitioning the nvme drive, so to have about 300Gb free alongside the windows partitions.

After windows reinstall and consequent updates, I prepared a ubuntu linux installer usbkey, using pendrivelinux tool, burning on the usbkey a current ubuntu 18.04 image.

Be sure to connect the screen to the first Display Port on the Nvidia board (the port closest to the maiboard).

I performed the ubuntu installation on the nvme drive, specifying a swap partition of 64Gb and the rest of the available space devoted to a linux ext4 root partition mounted on "/".

After checking correct boot of both windows and linux, I proceeded in setting up the nvidia drivers on the linux system. This is a bit tricky.

#lsb_release -a
Ubuntu 18.04.2 LTS

#apt-get update


#apt-get install nvidia-driver-390


Since the nvidia driver contains proprietary (non open source) code, when the installation is performed, it is requested to define a password that will have to be entered at the subsequent reboot, at a bios prompt, called MOK.


nvidia-smi shows the nvidia driver status

root@tsp330:~# nvidia-smi
Sat Jun 29 01:46:02 2019       
+-----------------------------------------------------------------------------+
| NVIDIA-SMI 390.116                Driver Version: 390.116                   |
|-------------------------------+----------------------+----------------------+
| GPU  Name     Persistence-M| Bus-Id        Disp.A | Volatile Uncorr. ECC |
| Fan  Temp Perf  Pwr:Usage/Cap|         Memory-Usage | GPU-Util  Compute M. |
|===============================+======================+======================|
|   0 Quadro P2000        Off  | 00000000:01:00.0  On |     N/A |
| 49%   42C    P8     6W /  75W |    282MiB /  5056MiB |     0%      Default |
+-------------------------------+----------------------+----------------------+
                                                                               
+-----------------------------------------------------------------------------+
| Processes:                                                       GPU Memory |
|  GPU       PID   Type Process name                             Usage      |
|=============================================================================|
|        1207      G   /usr/lib/xorg/Xorg                            39MiB |
|        1279      G   /usr/bin/gnome-shell                          52MiB |
|        1466      G   /usr/lib/xorg/Xorg                           112MiB |
|        1599      G   /usr/bin/gnome-shell                          73MiB |
|        2692      G   /usr/lib/firefox/firefox                       1MiB |
+-----------------------------------------------------------------------------+


In order to use the GPU processor cores from code, two main things are needed: a GPU driver and a set of libraries (CUDA).
Both of these come from nvidia, but there are significant dependencies issues.

Nvidia driver setup
We need to add some specific software repositories to install current nvidia drivers.


#add-apt-repository ppa:graphics-drivers/ppa
#apt-get update
#apt-get install ssh screen mc
#ip a l


We install also some other tools, namely to access the system from the network, via ssh (take note of the ip address of the system, and check its reachability from another system. It will be needed if something goes wrong with the graphical system). 

Now, opening the graphical tool "Software & updates" (use the search function to locate it: it has an icon with a carboard box with the planet earth), 
You will see several options under the driver tab

I first selected the 410 version, since it is labeled as a "long lived branch" on the nvidia website. Apply changes and the reboot.
At the reboot the workstation performed a bios reflash (quite scary), and then it was not loading the graphical system anymore. (I only got text console, and badly reacting). 

I entered via the network with ssh. Executed apt-get update and apt-get upgrade. Running nvidia-smi I got this error:

“NVIDIA-SMI has failed because it couldn't communicate with the NVIDIA driver. Make sure that the latest NVIDIA driver is installed and running.”


I then reverted to the old driver.

#apt-get install nvidia-driver-390

After giving the bios password, I was able to reboot in graphical mode.
I then went again in the Software & Update graphical tool, and selected nvidia-driver-430 (the newest one). After a reboot everything was fine. 
nvidia-smi now shows driver 430.26 and cuda version 10.2. Uname -a shows kernel 4.18.0-25

I assume that the nvidia drivers are ok now.

-------------


Cuda setup:


 #apt-get install linux-headers-$(uname -r)

Executing  #apt-get install nvidia-cuda-toolkit you can see it is offering cuda 9.1 version. From nvidia site, i see that there is cuda 10.1 version available from the nvidia repositories.

See:
https://docs.nvidia.com/cuda/cuda-installation-guide-linux/index.html
https://askubuntu.com/questions/1077061/how-do-i-install-nvidia-and-cuda-drivers-into-ubuntu

I then execute the following commands from root (over 4 Gb of packages are downloaded):

#sudo apt-key adv --fetch-keys  http://developer.download.nvidia.com/compute/cuda/repos/ubuntu1804/x86_64/7fa2af80.pub

#sudo bash -c 'echo "deb http://developer.download.nvidia.com/compute/cuda/repos/ubuntu1804/x86_64 /" > /etc/apt/sources.list.d/cuda.list'

#sudo bash -c 'echo "deb http://developer.download.nvidia.com/compute/machine-learning/repos/ubuntu1804/x86_64 /" > /etc/apt/sources.list.d/cuda_learn.list'

#apt-get update
#apt-get install cuda-10-1

#apt-get update
#apt-get upgrade
#apt-get install libcudnn7


After this, some lines have to be added to the .bashrc file in the user home, for all the users that have to use the cuda environment.

# set PATH for cuda 10.1 installation
if [ -d "/usr/local/cuda-10.1/bin/" ]; then
    export PATH=/usr/local/cuda-10.1/bin${PATH:+:${PATH}}
    export LD_LIBRARY_PATH=/usr/local/cuda-10.1/lib64${LD_LIBRARY_PATH:+:${LD_LIBRARY_PATH}}
fi


Then I performed another reboot, and not the nvidia-smi shows driver version 418.67 and cuda version 10.1. nvcc --version shows cuda version 10.1 too.
Going again in Software & Updates, current drivers appear to be 418. I set again the newest 430 and reboot again.
It now works in graphical mode, with nvidia-smi showing driver version 430.26 and cuda version 10.2. nvcc --version says cuda is 10.1
I now install nvidia profiler and another required library.

#apt-get install nvidia-profiler
#apt-get install libaccinj64-9.1


In order to test compiler and profiler functionality, create a text file with the following code and save it with add.cu name:

#include
#include
// Kernel function to add the elements of two arrays
__global__
void add(int n, float *x, float *y)
{
  for (int i = 0; i < n; i++)
    y[i] = x[i] + y[i];
}

int main(void)
{
  int N = 1<<20 span="">
  float *x, *y;

  // Allocate Unified Memory – accessible from CPU or GPU
  cudaMallocManaged(&x, N*sizeof(float));
  cudaMallocManaged(&y, N*sizeof(float));

  // initialize x and y arrays on the host
  for (int i = 0; i < N; i++) {
    x[i] = 1.0f;
    y[i] = 2.0f;
  }

  // Run kernel on 1M elements on the GPU
  add<<<1 1="">>>(N, x, y);

  // Wait for GPU to finish before accessing on host
  cudaDeviceSynchronize();

  // Check for errors (all values should be 3.0f)
  float maxError = 0.0f;
  for (int i = 0; i < N; i++)
    maxError = fmax(maxError, fabs(y[i]-3.0f));
  std::cout << "Max error: " << maxError << std::endl;

  // Free memory
  cudaFree(x);
  cudaFree(y);

  return 0;
}


After preparing this file, we can compile

$nvcc add.cu -o add_cuda

And we get the add_cuda executable, which works.
We can then profile its execution, from root:

root@TSP339:/home/coder/cuda# nvprof ./add_cuda
==6205== NVPROF is profiling process 6205, command: ./add_cuda
Max error: 0
==6205== Profiling application: ./add_cuda
==6205== Profiling result:
            Type  Time(%)      Time     Calls       Avg       Min       Max  Name
 GPU activities:  100.00%  248.23ms         1  248.23ms  248.23ms  248.23ms  add(int, float*, float*)
      API calls:   67.05%  248.29ms         1  248.29ms  248.29ms  248.29ms  cudaDeviceSynchronize
                   32.74%  121.24ms         2  60.621ms  72.403us  121.17ms  cudaMallocManaged
                    0.11%  410.24us         2  205.12us  199.94us  210.31us  cudaFree
                    0.06%  214.62us        97  2.2120us      89ns  147.25us  cuDeviceGetAttribute
                    0.02%  87.711us         1  87.711us  87.711us  87.711us  cuDeviceTotalMem
                    0.02%  57.659us         1  57.659us  57.659us  57.659us  cudaLaunchKernel
                    0.01%  20.944us         1  20.944us  20.944us  20.944us  cuDeviceGetName
                    0.00%  2.3990us         1  2.3990us  2.3990us  2.3990us  cuDeviceGetPCIBusId
                    0.00%  1.6290us         3     543ns      86ns  1.1260us  cuDeviceGetCount
                    0.00%     541ns         2     270ns     132ns     409ns  cuDeviceGet
                    0.00%     173ns         1     173ns     173ns     173ns  cuDeviceGetUuid

==6205== Unified Memory profiling result:
Device "Quadro P2000 (0)"
   Count  Avg Size  Min Size  Max Size  Total Size  Total Time  Name
      48  170.67KB  4.0000KB  0.9961MB  8.000000MB  735.5200us  Host To Device
      24  170.67KB  4.0000KB  0.9961MB  4.000000MB  360.0960us  Device To Host
      12         -         -         -           -  2.480928ms  Gpu page fault groups
Total CPU Page faults: 36
root@TSP339:/home/coder/cuda#


This completes CUDA setup.


Saturday, May 25, 2019

Papà


Arrigo Guardigli (19.7.1937 - 25.5.2019)


A e mi Bab


Nenca te, e mi Bab
t'at avej
e in sti de che piov sempar
tsi ariv in te fond de cavdel.

Aiai aiai, aj ho det,
"boia d'un mond d'ledar"
coma t'givta te
e um's è rot qualquel in dentar a e cor.

Incù a so armast a guarder piovar,
coma un invurnì,
cun cal do castegn mati in tal man
ch a jo truvè in tla bisaca d'e tu capot.

E sta not am so svigiè
ch'um pareva ad sintì qvicadon bisighè in tla porta,
e an so ste piò bon ad durmì
pinsend a tot quel t'e fat par me e par mi fradel.

Te tsi quel ch’us ha insignè tanti cos,
mo che un gn'era quasi mai
e nenc che quand ch’uj era
un badeva miga tant.

Am arcord ad quand a zughema a zachegn,
ad quand a vulema l'aquilon,
al cavariol che t'am fasivta fe in te let,
e gl'instè quand ch'andema a cojar al mori in pgneda.

Ma tot stal parol, aln cota gnit,
spersi coma l'acva in tl'acva
in cunfront a cl'etra sera, in t'e bsdel
ch'a jo stret la tu man par l'utma volta.

At salut, Bab,
E am aracmand, saludam tant la mama
che a so sicur ch'lat te da ste'
lasò in te zil.


Marco
27.5.2019

Sunday, February 3, 2019

Hand Spinning Wool: some samples


#MYWOWPROJECT

As described in Dog Wool Adventures I recently started exploring the world of fibers, and the related techniques for processing fibers creating threads and yarns.

My own dog wool was not enough to get a useful grasp of this world, so I decided to make an investment and buy some fiber from a professional supplier.

I wanted to have biological fibers, possibly free from any heavy chemical processing. After some scouting, I decided to make an order from a british supplier: World of Wool.

The supplier offers a vast choice among many natural wool fibers. I decided to source some wool in decent quantity (400g) to allow some complete project and some other wool in the form of samples, just to have the possibility to understand the features of the fibers.

Overall I bought about 3.5Kg of pure wool, and I spent about 120 euros.


The package took about 10 days to be dispatched (England to Italy).


And here are some pictures of the contents: each wool is individually packaged in a ziploc plastic bag, with a label indicating article number and product description, as well as order number.
Everything was well packaged and ordered.


These products are really amazing. It is simply great to touch the fibers, and it is impossible to translate that feeling into text. Each wool has a different texture, and each of them is really beautiful.
Being inexperienced, I need to build some feeling with these materials.

After unpacking the box, I decided to spin a small sample of each wool and to prepare a sampler. I came out with a carboard on which I was attaching each sample with adhesive tape.
I also put on the board other samples I made with additional fibers I had in my stash (and of course a sample of my dog hair :-).


I decided to start spinning first the white 56 english top, making a single. It is among the less expensive, and I think it is a really nice wool.

I will then decide to ply it with itself or with some other single.


Wednesday, January 30, 2019

Monday, January 28, 2019

Dog Wool Adventures

I am the lucky owner of this amazing creature named Loti (a Golden Retriever dog)


Having groomed Loti every week since when I adopted him in 2012, by the end of 2018 I had enough hair to begin the adventure of creating actual clothes with his wool.

It was a very interesting project, in which we were learning a lot and having a lot of fun.

The activities we performed may not be the best possible way to make garments out of dog's hair: Considering our previous zero experience in the field, there could be far better and more effective ways.

Anyway, this is what we did:

1. Actual hair (fleece) collection: this process in my case lasted 5 years.
2. Hand washing fleece in cold water, with shampoo and conditioner, to prevent felting
3. Rinsing and slow drying
4. Hand removal of any impurities
5. Carding: a sort of combing performed (in my case) with hand carders tools
6. Preparation of rolags, suitable for spinning
7. Hand spinning, in my case with a spinning wheel, producing threads called singles
8. Plying, which is combining more singles getting a composite yarn filament (to be arranged in skeins)
9. Knitting the yarn to produce the garments

The spinning wheel I bought is the Ashford traditional, single belt drive. I bought it from the Italian official importer TessereIncontri ( http://www.tessereincontri.org/ )
The spinning wheel comes with assembly instructions, that I was carefully following. (not more complex than any ikea furniture, but this thing is quality solid wood).


I bought also a pair of standard classic hand carders, 72 points density.


The quality of the products I bought is excellent: wood is solid, construction is accurate. After careful assembly the spinning wheel is robust and strong. I decided to buy the traditional model, which is solid ash wood, with no paint.


---------

Now some pictures about our process.

This is the wool after being washed, purfied form grass and dirt, and separated in locks.
It is very important to avoid any felting during the wash process. We performed it in cold water, using either: light shampoo and hair conditioner or wool specific detergent and softener.


After carding, we get fibers that are mixed, averaged and separated, either in "cloud" or in "rolag" form.


Rolags are "wool sausages", where the fibers are prepared in a roll, so to ease spinning.


Learning to spin and actual spinning required quite an effort. It was not easy to understand how to use the spinning wheel and how to use my own fingers.

It took a while and lots of youtube search and watch.
This is how one of my first spools looked after spinning.


With wool spinning you produce a thread which is called a single. This thread has to be coupled with at least another thread to become usable yarn. Two or more singles combined become yarn thru the process of plying.

Here is one of our skeins and a ball of our 3-plyed yarn.


We decided to ply Loti's wool with two other threads: one single made from another wool (a superwashed wool we bought), and an acrylic yarn. The intention of this being to increase the yield of our wool (we did not have that much) and to reduce itchiness.

We made many of these balls, and out of those my partner knitted two beautiful caps and a large scarf. They are really super warm!


and Thank you Loti! Woof!


Sunday, November 4, 2018

Building a shaving horse

A shaving horse is a woodworking tool, traditionally used to work on freshly cut, green material (green woodworking).

Shavehorses have been built in many different variants, but the working principle is the same: allowing efficient use of draw knives, locking the wood in position while working on it.

Here is a video by Ben Orford explaining its use


I built my shave horse out of scrap wood. Basically I used a large old board, and some smaller 8cm x 5cm I had around.

I wanted to have something very stable and heavy, that would take a lot of load. I decided to build the three legs of board sections. I designed the joinery to be rigid and reduce any movement.


I built the moving part creating a solid and square wood frame.
I drilled holes in the vertical bars.
I then planted in the horizontal board large metal screws with washers to allow the vertical structure to pivot.

I used a simple hinge to fix the lower end of the sloping board to the main bench.
A simple free moving wood block allows to change the slope, adjusting the clamping  on the work piece.


The following videos were interesting and useful for me during my research, from experienced craftmen. I recommend the videos by mr. Harry Rogers.


Saturday, December 31, 2016

w3make.it fablab setup

Here is the timelapse video describing the w3make.it fablab setup. 


Timespan jul-dec 2016

This video is also available on the w3make.it website, here.


Thursday, April 14, 2016

Wood cutting workbench for chainsaw

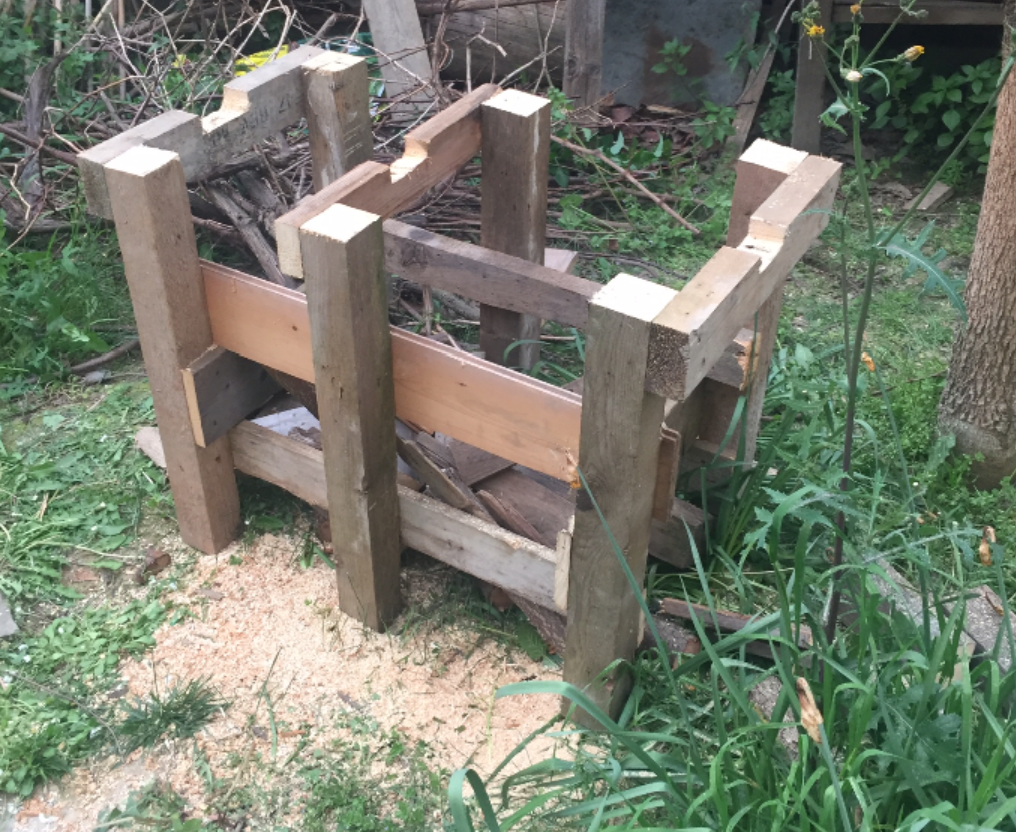
Wood cutting workbench for chainsaw use

April 2016


After getting the new wood burning stove I decided to buy an electric chainsaw to prepare the wood pieces.


I have an older traditional two-stroke gasoline powered chainsaw but I wanted something with less maintenance and not so moody when it is needed to operate in cold weather.

So I bought this Hitachi electric chainsaw for about 140 euros
It has 400mm bar, and comes equipped with an Oregon 91PX057X low kickback chain
Hitachi CS40SB


Since chainsaws are quite dangerous tools, in order to use it with reduced risks, I decided to design a special "table" to support the logs to be cut, minimizing the risk of unwanted movements, and making the wood cutting job as safe as possible even for a single operator.


I came out with this first sketch  (made on ipad with sketch-club app)


But this failed to convince me about sturdiness, particularly for the lateral side supports.

I then came up with this one


6 legs, robust rectangular frame, modular, easy to build, requiring simple wood cuts, and nails.
I was happy with this design.


So I built it, with wood I had lying around.
The 6 vertical legs are 10x10cm. the three horizontal supports are 10x4cm.

I added some reinforcements to make it more sturdy and robust.

Building it required just a couple of hours. I used 6cm and 10cm nails.
Overall width is about 80cm. It is not very heavy and can be easily moved.


I decided to make it asymmetrical, so to have places for shorter and longer logs.
the left side clearance is smaller and allows working with light logs.
The inside is easily accessible to collect cut pieces.


I used the workbench and it works perfectly.
The logs fit in the central grooves and are steady while being cut.
Safety also appears quite good.

Enjoy!

@mgua


Saturday, August 29, 2015

building a chicken-house

How I built a new house for my chickens

In my garden I have two chickens. They are producing daily fresh eggs, eating vegetables and food remains.

I decided to build a new and larger house, because last week I introduced 3 new indian runner ducks in the family.

I designed the construction to be built from scratch wood parts that I had. I took some ideas from other pictures around the web (try image search for chicken coop).

Basic requirements:
The house not to be directly on the ground
The egg laying nests to be easily accessible
Robust and easy to clean

Here are some pictures of the building process.

I started building the basic frame, considering that the legs would have been planted in the ground


My friend Ilir was helping me


This is the back accessible structure for eggs collection


There are four internal nests


the ladder to get in


structure ready for paint. Legs already painted with bitumen.


Painting complete

Positioning

The easily accessible nest shelf


Friday, July 10, 2015

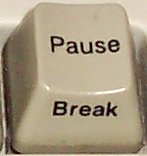
New Lenovo Thinkpad: no more BREAK key


There is not the BREAK key in new Lenovo Thinkpads laptops.


There is not even the PAUSE key.
On older machines, BREAK key was obtained with CTRL-PAUSE


In Lenovo Thinkpad T540p, with italian keyboard, i can get PAUSE with FN-P and BREAK with CTRL-FN-P

Apparently, this is not consistent with other Lenovo Laptops, where you can get BREAK with FN-ALT-B 

(dec2023) On Windows 11, I managed to send to the (lotus notes) application the CTRL-BREAK using the on screen keyboard (osk) and sending CTRL+SCRLK


here is a source:
http://forum.notebookreview.com/threads/no-insert-and-sysrq-keys-on-e220s.579456/#post7505268

Fn+B= break
Fn+P= pause
Fn+S= sysrq
Fn+C= ScrLK
Fn+I= insert


@mgua

Thursday, July 2, 2015

greedy zabbix_sender chokes on too many data

Greedy zabbix_sender chokes on too many data

zabbix_sender tool performs a partial database import when fed with too many data at once.

I am using zabbix_sender tool to inject into a zabbix database data samples related to computer network statistics.

I start with a clean zabbix database, after clearing zabbix historical data for some items, so that the database is empty. Then I load new data with zabbix sender tool, and then I analyze the data mostly in graphical mode, checking the behaviours of the systems under particular loads, using zabbix graphical interface for historical navigations, statistics, and graph overlapping. When I am done with the analysis, I again delete historical values, and load a new batch of values.


I need to manage about 500.000 records. The problem I am describing here was not evident until data processed by my scripts was below 40.000 records. Problem was not evident using non differential valued zabbix items.


Problem is that, when loading the data via zabbix_sender, from an input file 

[...]
100.10.4.8 FailedConnectionAttempts 1434719102 114715
100.10.4.8 ResetConnections 1434719102 51829088
100.10.4.8 CurrentConnections 1434719102 298
100.10.4.8 SegmentsReceived 1434719102 321966025
100.10.4.8 SegmentsSent 1434719102 1445309521
100.10.4.8 SegmentsRetransmitted 1434719102 64705214
100.10.4.8 ActiveOpens 1434719402 981491
100.10.4.8 PassiveOpens 1434719402 312320429
100.10.4.8 FailedConnectionAttempts 1434719402 114732
100.10.4.8 ResetConnections 1434719402 51833025
100.10.4.8 CurrentConnections 1434719402 459

[...]

Using the following command line:
zabbix_sender -z 127.0.0.1 -T -i zbx-inputfile.txt

I get no errors when executing this, but older data are badly imported.

I think this is depending on data being processed by different threads of zabbix server (zabbix trappers) which can not talk each other considering that some data is to be interpreted as difference with the previous value. Differential data requires all the values to be sequentially injected and processed by a single zabbix-trapper thread.
Strangely, I did not find any mention to this potential problem, but you can not expect anything good if you are going to insert historical values in any series which is to be considered in differential mode, because data is processed before being inserted in the database, and the difference with the previous value is the actual value which goes in the database.
I tried to use -r (realtime) option in the zabbix_sender command line, but this did not give any improvement (actually I did not understand precisely what the realtime option is for).

I know that I am using Zabbix and zabbix_sender tools in a way that is probably quite far from the designer scopes, but I love this great software.

I was able to solve the issue slowing the speed at which data are sent to zabbix_sender.
In order to do this I built a filter tool which slows down a unix communication pipe.

The tool is a simple perl script called slower-pipe which sends some lines, then wait a specific time before sending the next chunk

cat zbx-inputfile.txt | slower-pipe.pl 100 2000 | zabbix_sender -z 127.0.0.1 -T -vv -i -

Using the tool to slow the input feed (100 lines per chunk and 2 seconds wait) the problem vanished.
The reason for this kludge to be effective lies probably in the fact that slowing down the input data flow, a single zabbix-trapper thread is considered enough, and calculations of the differential items are correctly processed.

here is the (perl) source code for slower-pipe.pl
just copy it, save it into slower-pipe.pl and then chmod +x appropriately


#!/usr/bin/perl
#
# mgua@tomware.it
#  this code is free software, GPL licensed.
#
# produces a slower passage over a pipe
#
# Syntax:
# slower-pipe chunksize msec
#   parameter1: chunksize (lines)
#   parameter2: milliseconds to wait after each chunk
#
#

use Time::HiRes qw(usleep nanosleep); # microsecond sleep

my $DEBUG = 0;
my $chunksize = 1;
my $msecwait = 10;      # milliseconds wait

if (($#ARGV + 1) ne 2) {
        die("Usage: slower-pipe chunksize msecwait\n   chunksize: number of lines per block\n   msecwait: milliseconds to wait after sending each block\n");
}

if ($ARGV[0] ne "") {
        $chunksizein = $ARGV[0];
        if ($chunksizein > 1) { $chunksize = $chunksizein; }
        print("chunksizein = [$chunksizein] chunksize=[$chunksize]\n") if $DEBUG;
}

if ($ARGV[1] ne "") {
        $msecwaitin = $ARGV[1];
        if ($msecwaitin > 1) { $msecwait = $msecwaitin; }
        print("msecwaitin = [$msecwaitin] msecwait=[$msecwait]\n") if $DEBUG;
}

my $usecwait = 1000 * $msecwait;


while () {
        print($_);
        if (($. % $chunksize) == 0) {
                print(" delay\n") if $DEBUG;
                usleep($usecwait);
        }
}


enjoy!


@mgua